
Bullet Journaling has been a hot trend for a little while in the planner and organizational communities online, but it may not be something that you’ve heard of. If not, you’re in for a treat. If you love to-do lists and check-lists, this is something you don’t want to miss. The minute I learned about it, I was hooked.
 If you have too many things to remember and think about on a daily basis and you need a simple system to help you keep track, bullet journaling was made for you. As people, and caregivers especially, we all have a lot of different daily tasks, appointments, and various things we need to remember. Trying to keep track of everything in our head becomes exhausting. And if you are a working caregiver or in the sandwich generation, it becomes nearly impossible. Just think of how much more productive and less stressed you’ll be if you can stop trying to remember all this “stuff”. I constantly have little to-do lists floating around the house, but once I started using this system, everything is now all in one place.
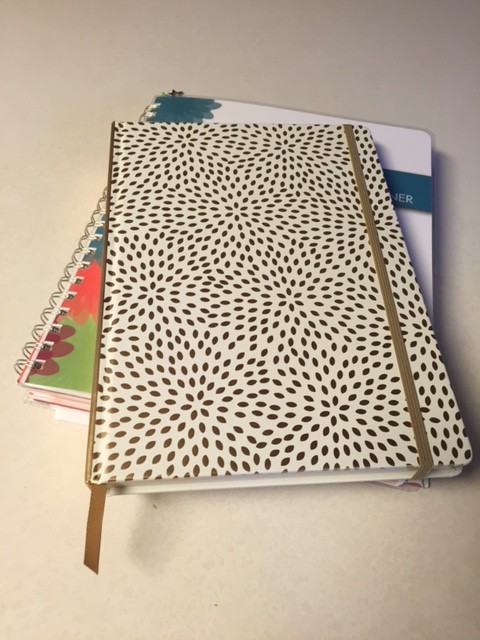
First, you’ll need a journal. Any journal will do but be sure that it has at least 31 lines on each page (for the days of the month). An elastic to keep the journal closed is also helpful and I found that having a ribbon to bookmark the daily task page is perfect .
If you’re more visual, skip to the video below.
A bullet journal usually consists of three different parts.
The first part includes the index. They will occupy the first two pages of your journal and help you stay on track with what’s where and how the journal works. The key can also be listed here or in the very front of the book or on a little fold-out, as mine is.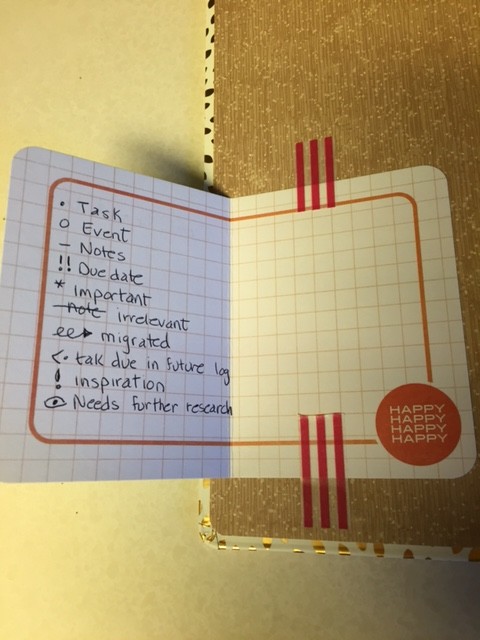
This is the key that I use:
A dot = a task
A circle = an event
A line = a note
(all of these can be X’d out so an X = a completed event.)
A task, event or note with an asterisk in front = something important
An exclamation point = something inspirational
2 expanation points = something with a due date
An eyeball sign = something that needs more research or learning
A task that has a line through it was not worth completing or has become irrelevant
~~> means something (task, event) was not completed and migrated to a new list
~~< means something (task, event, note) that is listed on a different month in the Future Log
The second part of the bullet journal consists of a future log or calendar, and then running daily entries – more on how these work in a minute.
The last part of a bullet journal is something called collections or lists of notes. They are just that, notes about related things you want to keep track of. For example, you may have a list of books you want to read (someday), or notes about medications that your loved one is taking.
The idea with a bullet journal is that you set aside two pages for your index and then record things (and they pages where you’ll find them) as they come up throughout your day, week, or month.
On the next blank 2-page section, you will make your future log. Label it Future Log. Using a ruler draw to horizontal lines to divide the first page into 3 equal sections. Do the same on the opposite page as well. Label each section with the name of the month. Now number these pages and add them to your index. For example – Future Log: 3-4. If it is early in the year, do the same thing for the next page(s), as well. Everything you know in advance goes on your future log under the corresponding month.
At the beginning of the month, on the next blank page spread, you set up a monthly page. This is your space to record appointments, birthdays, etc.
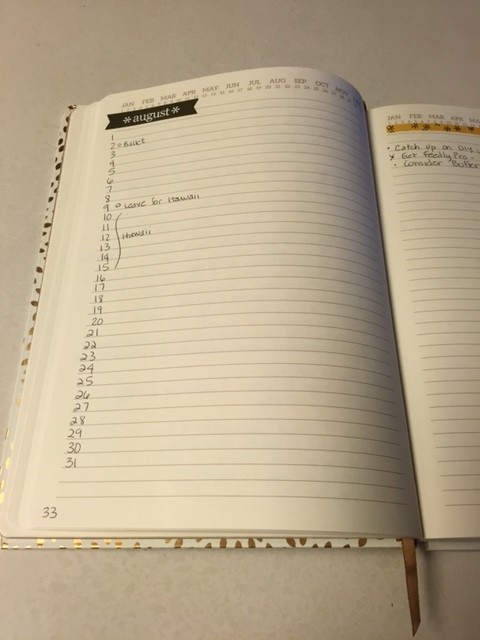
Number the lines on the left-side page 1-30 (or 31) and then add the first letter (or 2) of the day of the week alongside it, for instance, 18M. Leave space on the line to note appointments as they come up. Some prefer to draw a more traditional monthly calendar grid over two pages, but I’m not that artistic. Try both and see what works better for you. On the right side of your page, you will list all the tasks that you want to complete that month. As you draw each monthly grid or list at the beginning of the month, number the pages and add that to your index. On the last day of the month, add the task “Migrate”. At the end of the month, or very, very slightly before, add the next month to the next set of blank pages, and migrate all known appointments or tasks. Don’t get carried away and set up all the months in advance. Trust me on this.
On the next blank page set, enter today’s date and start recording things you need to take care of, appointments to keep today, and anything else you need to keep track of including quick notes (possible allergic reactions to a medication, for instance) and ideas. This is where you key comes in handy. It takes a little while to get used to, but after using it a few times, it comes naturally.
At the end of the day, review your list. Things that have not been completed need to either be crossed out because they are no longer relevant and important, or they should be moved to the next day. If you don’t want to, or can’t tackle an item or two the next day, leave it open and make sure you review and work it in at a later date.
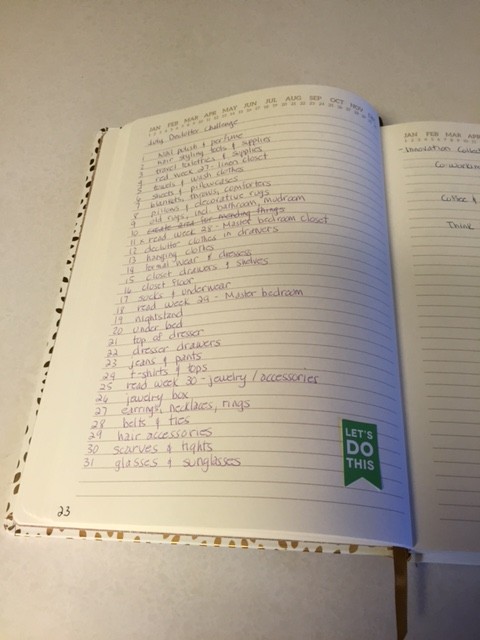
Your “notes” can be added at any time to the next blank page. Label the name of the note on the top line on the left-hand side. Number the page(s) and add it to your index. A note can be anything you want it to be: meeting notes, doctor appointment notes, meal plans, a list of shows to watch on Netflix, etc. Mine, below, is the July decluttering challenge items.
I don’t use my bullet journal as a replacement to my planner. I still use my planner on a daily basis. The bullet journal just helps me keep track of all my thoughts and to-dos – all in one place.
Here’s a great video on how to get started.
If you give this a try, please let me know. I’d love to see how it works for you.
LEARN TO LOVE YOUR LIFE AGAIN
 Do you feel like you need to hit the REFRESH button on your life? Download our free guide and begin to create your best life yet!


I have found that my bullet journal has everything my family will need to have or know if and when I’m not able to speak for myself. I’ve been in charge of the management of my own chronic conditions until recently. Now, my husband and son have taken over most things because I can’t. The bullet journal is a sort of brain download of things that work or don’t., lists of medications, doctor’s notes, appointments, diet restrictions.
, etc. AND best of all, I can index this information. I wish I had this when I was the caregiver.